
Google Home Miniで何か動かしたいと思って、作ったのがコレ。
まずは単純に手元にあったドロイド君のフィギュアの頭を左右に回せるように首にサーボを入れてみた。
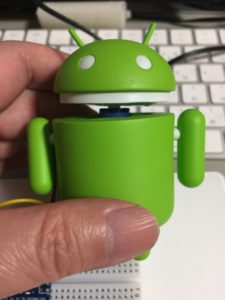
ドロイド君
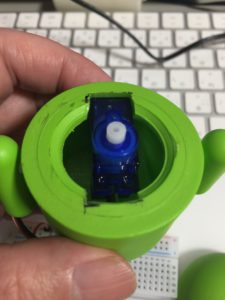
ドロイド君(サーボ部分)
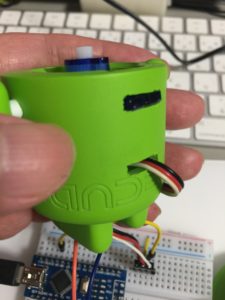
ドロイド君(サーボ部分)

ドロイド君(頭部)
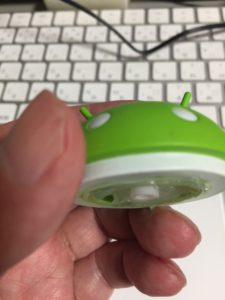
ドロイド君(頭部)
あとはArduinoでサーボを制御。
本当はサーボには別の電源から供給した方がいいんだろうけど、とりあえずここではUSBからの5Vで動かしています。

Arduino Nanoとドロイド君
最終的に、USB経由のシリアル通信で’r’, ‘l’, ‘c’で「右」、「左」、「中央」に首を振るようにした。
さらに’r’も’l’も1秒で中央に戻るようにしたので、’c’は使わなくていいようにした。
#includeServo myservo; void setup() { // put your setup code here, to run once: Serial.begin(9600); myservo.attach(9); delay(100); myservo.write(90); } void loop() { // put your main code here, to run repeatedly: if (Serial.available() > 0) { int c = Serial.read(); //Serial.write(c); if (c=='c') { myservo.write(90); } else if (c=='l') { myservo.write(10); delay(1000); myservo.write(90); } else if (c=='r') { myservo.write(170); delay(1000); myservo.write(90); } } }
次にRaspberry Pi 3にGoogle Home Notifierを入れて使っていたので、そのGoogle Home Notifierのexample.jsにシリアル通信部分を追加して対応した。
それにngrokが使えると便利だし。
var express = require('express');
var googlehome = require('./google-home-notifier');
var ngrok = require('ngrok');
var bodyParser = require('body-parser');
var app = express();
var SerialPort = require('serialport');
var port = new SerialPort('/dev/ttyUSB0', {
  baudRate: 9600
});
const serverPort = 8080;

port.on('open', function() {
  console.log('Serial open.');
});

var deviceName = 'Google Home';
googlehome.device(deviceName);
// googlehome.accent('uk'); // uncomment for british voice

var urlencodedParser = bodyParser.urlencoded({ extended: false });

app.post('/google-home-notifier', urlencodedParser, function (req, res) {
  if (!req.body) return res.sendStatus(400)
  console.log(req.body);
  var text = req.body.text;
  if (text){
    res.send(deviceName + ' will say: ' + text + '\n');
    googlehome.notify(text, function(res) {
        console.log(res);
    });
  }else{
    var dd = new Date();
    var dice = dd.getMilliseconds()%2;
    if (dice==0) {
      port.write(new Buffer('l'), function (err, results) {});
    } else {
      port.write(new Buffer('r'), function (err, results) {});
    }
    res.send('Please POST "text=Hello Google Home"');
  }
})

app.listen(serverPort, function () {
  ngrok.connect(serverPort, function (err, url) {
    console.log('POST "text=Hello Google Home" to:');
    console.log('    http://localhost:' + serverPort + '/google-home-notifier');
    console.log('    ' + url + '/google-home-notifier');
    console.log('example:');
    console.log('curl -X POST -d "text=Hello Google Home" ' + url + '/google-home-notifier');
  });
})
さらにIFTTTでGoogle AssistantとWebhookでAppletを作って、次のように設定した。
Google Assistant部分
| フィールド | 値 |
|---|---|
| What do you want say? | あっちむいて |
| What’s another way to say it? (optional) | (空欄) |
| And another way? (optional) | (空欄) |
| What do you want the Assistant to say in response? | ほい |
| Language | Japanese |
Webhook部分
| フィールド | 値 |
|---|---|
| URL | https://??????.ngrok.io/google-home-notifier |
| Method | POST |
| Content Type (optional) | application/json |
| Body (optional) | test |
※ URLの??????部分は起動する毎に変わるので、その度にIFTTTの設定を変えている。
本来は「あっち向いてホイ!」と全部こっち側がしゃべるべきだけど、反応も欲しいので「あっち向いて」までしゃべるとGoogle Home Miniに「ホイ」と反応させている。